hole detection

Detecting Holes on a Workpiece Using Darknet

Introduction

In this tutorial, we will use a supervised method for detectiong holes in an image of a workpiece. In particular, we will train a Convolutional Neural Network (CNN) and we will use it for detecting the holes. We will use Darknet, an open source neural network framework, and Google Colaboratory, a free environment that runs entirely in the cloud and provides a GPU.

First of all, we need to create a set of images to training the neural network. In this case, we use the directory structure requested by Darknet.

Goals

We will learn how to:

1. Create a training and testing data set
2. Train a Convolutional Neural Network
3. Detect the object of interest

Creating the Dataset

1. Create a data folder that includes two subfolders:

  • JPEGImages: all the images in jpeg format
  • labels: that contains the .txt files (one for image) in which the bounding boxes are specified in Darknet format. This format demands that there is a rows for each object in the image and each row has five parameters separated by space: the class of the object represented and the four coordinates of bounding box.
    positive images icon


2. Create the following five files that you will move into Darknet’s folders:

  • train.txt: with the absolute path to the images for training (e.g. /content/darknet/data_train/JPEGImages/00001.jpg)
  • test.txt: with the absolute path to the images for testing/validation (e.g. /content/darknet/data_test/JPEGImages/00001.jpg)
  • <name>.data:that has the following structure
        classes = number_of_classes
        train = /absolute/path/colab/to/the/train.txt
        valid = /absolute/path/colab/to/the/test.txt
        names = /absolute/path/colab/to/<name>.names
        backup = backup/
  • <name>.names: that contains the classes’ names (one in each row), consistent with the labels assigned in the images. For example, if class 0 corresponds to a cat, the first row of this file must be ‘cat’
  • <my_dataset>.cfg: a copy of configuration file chosen (for example yolov3.cfg), in which you will modify filter and classes’ numbers. In particular, if the classes are 3, you have to change in the whole file the following rows in:
    classes=3 and the rows named filters that appear before the rows classes with (classes+5)*3.
    For example, if classes = 3 → filters = 24.
    In this file, you can modify also the image resolution by changing width and height and the network parameters for batch and subdivision sizes.

The final weights will be saved in backup folder.
 

Train the neural network

Now you can create a new Google Colaboratory session for training the neural network.

After creating Colaboratory file in your Google Drive, you have to change the runtime type: form Runtime menu select Change runtime type and choose GPU as Hardware accelerator.

STEP 1. Connect the Colab notebook to Google Drive

Execute the following code in a new cell and click on the link to authorize the notebook to access to your Drive

# This cell imports the drive library and mounts your Google Drive as a VM local drive. You can access to your Drive files
# using this path "/content/gdrive/My Drive/"
from google.colab import drive
drive.mount('/content/gdrive')

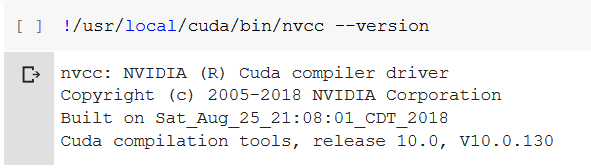
STEP 2. Check CUDA release version

# This cell can be commented once you checked the current CUDA version
# CUDA: Let's check that Nvidia CUDA is already preinstalled and which version is it.

nvcc version preinstalled

STEP 3. Install cuDNN according to the current CUDA version

You need to download cuDNN from Nvidia website Since Colab runtime has CUDA 10.0 preinstalled, you need to download cuDNN v7.5.0.56 for CUDA v10.0. After that, you can upload this file .tgz in your Drive (you can create a folder named darknet_colab and put in any file related to the training).

Now, you can unzip the cuDNN files

# We're unzipping the cuDNN files from your Drive folder directly to the VM CUDA folders
!tar -xzvf gdrive/My\ Drive//cudnn-10.0-linux-x64-v7.5.0.56.tgz -C /usr/local/
!chmod a+r /usr/local/cuda/include/cudnn.h


# Now we check the version we already installed.
!cat /usr/local/cuda/include/cudnn.h | grep CUDNN_MAJOR -A 2

Step 4. Installing Darknet

# Leave this code uncommented on the very first run of your notebook or if you ever need to recompile darknet again.
# Comment this code on the future runs.

!git clone https://github.com/kriyeng/darknet/
%cd darknet

# Check the folder
!ls

!git checkout feature/google-colab

#Compile Darknet
!make clean

!make

#Check if Darknet runs
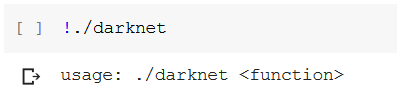
!./darknet

You should get the output
darknet command

Step 5. Training YOLO

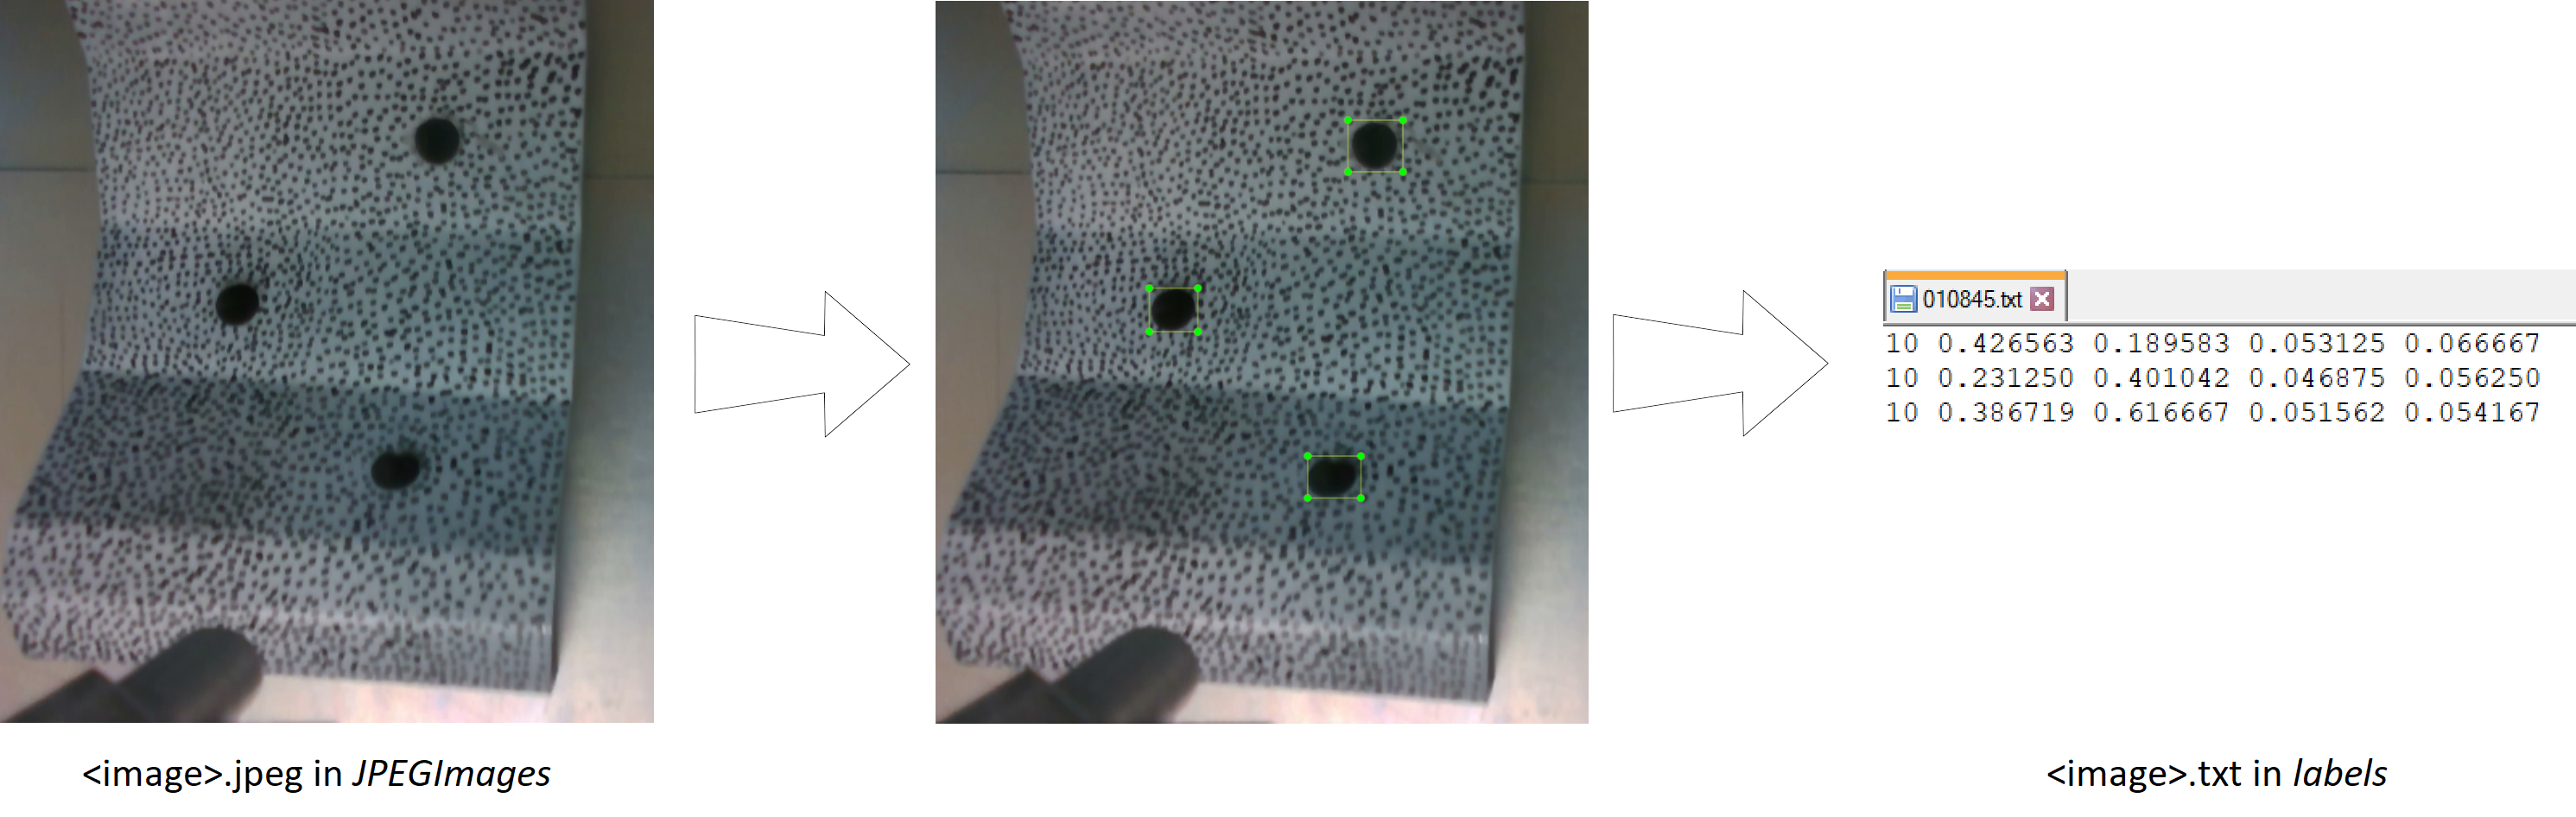
Now, you need to import in Colab from your local file system, all the files you created in the first part of this tutorial. The instructions for doing this are

from google.colab import files
files.upload()

You need to import the folder that includes the images, the files train.txt, test.txt, <name>.data, <name>.names, <my_dataset>.cfg and the weights file that you can use to start the training (available here)

When you import a file in Colab it will be put in your current directory, so you need to move some in particular folder with these instructions:

!mv <name>.data cfg/
!mv <name>.names data/
!mv <my_dataset>.cfg cfg/

To import the folders in Colab you need to create compress files, so you have to unzip them now:

!unzip <folder_with_images>.zip

For this folder you have to create a path equals to that expressed in train.txt (test.txt).

The train.txt, test.txt and the first weights files can remain in the principal folder darknet.

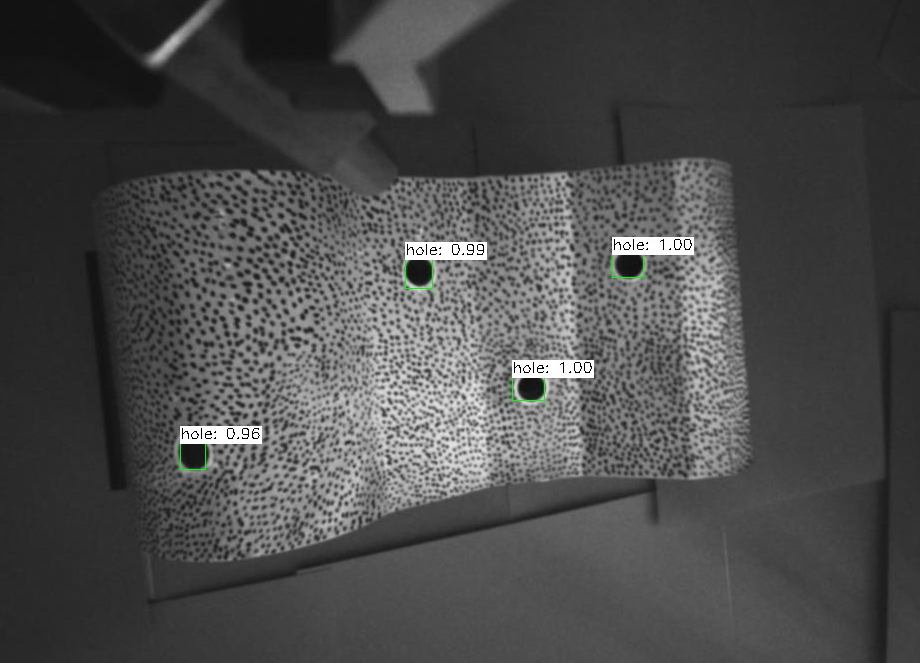
And now, you can start the training with darknet

!./darknet detector train cfg/<name>.data cfg/<my_dataset>.cfg darknet53.conv.74 -dont_show -mjpg_port 8090

Detection

When the training is complete you can test on an image the final weights file by editing the <my_dataset>.cfg file (comment the lines about the training and uncomment those relating to testing) and executing the following command:

!./darknet detector test cfg/<name>.data cfg/<my_dataset>.cfg <final_name>.weights <image_name>.jpg

Results

The hole detector described in this tutorial has been used in a project realized by AREA Laboratory, School of Engineering of University of Basilicata

positive images icon